Elive NVIDIA Proprietary Driver Installation Guide
This guide focuses exclusively on installing NVIDIA proprietary drivers on your already installed Elive system. The open-source nouveau driver often claims the graphics card first, causing conflicts. To succeed, we must boot into a clean console environment, without graphical interfaces or framebuffers, and then use the streamlined Elive tool.
The Elive Way (Strongly Recommended)
Elive provides a dedicated tool, nvidia-privative-drivers-install, that automates the entire process. It handles package installation, kernel header matching, module compilation, blacklisting, and Xorg configuration. It exists to make this notoriously difficult task easy for everyone.
Please report any failures to the Elive team. Every bug report helps us improve the tool so it works flawlessly for all hardware configurations.
Step-by-Step: Installing on an Installed Elive System
1. Boot into a Non-Graphical, Non-Framebuffer Console
To install the proprietary driver, nouveau must be completely absent and the framebuffer must not claim the GPU. Follow these steps to enter a pristine text console:
- Reboot your computer.
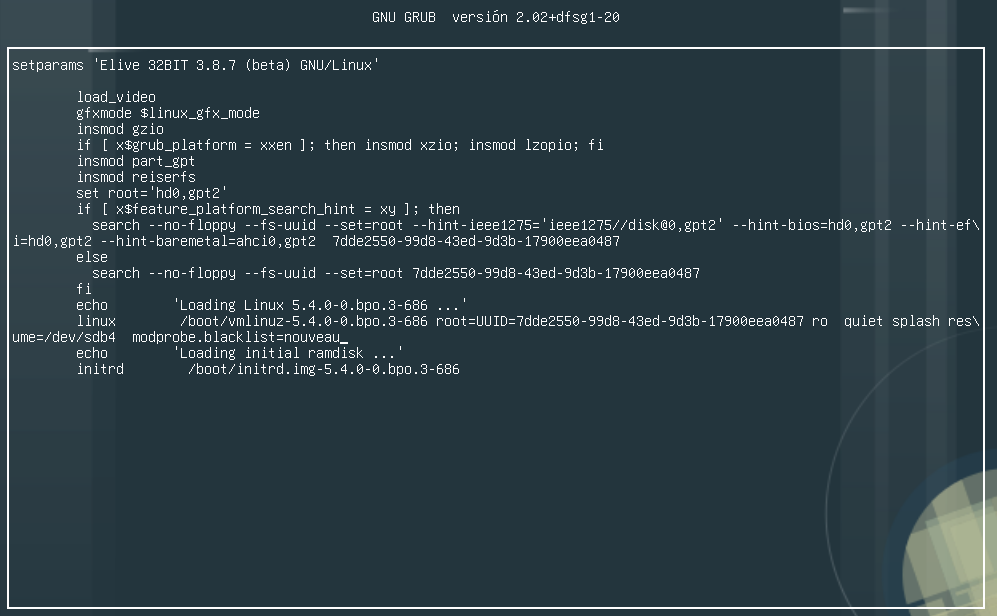
- At the GRUB boot menu, highlight your Elive entry and press the
ekey to edit the boot parameters. - Find the line that starts with the word
linux. It contains the kernel and boot arguments. - Append the following parameters to that line (separated by spaces):
modprobe.blacklist=nouveau nomodeset 3modprobe.blacklist=nouveau– Prevents the kernel from loading the open-source driver.nomodeset– Disables kernel mode setting (KMS), preventing the framebuffer from taking over your NVIDIA card.3– Boots directly into runlevel 3 (multi-user text mode) instead of starting the graphical interface.
- Remove the
quietandsplashparameters if present, this gives you verbose output to track any errors during boot. - Press
F10(orCtrl+X) to boot with your modified parameters.
Example of Grub boot menu to edit:
You will now be dropped into a text-based login prompt.
2. Run the Elive Installation Tool
Log in as root or your normal user (then use sudo). Now, execute the tool.
Basic Interactive Installation
Simply run:
sudo nvidia-privative-drivers-install
The tool will detect your NVIDIA card, suggest a recommended driver version, and guide you through the installation.
Advanced Options (Based on the New Tool)
The tool now supports a comprehensive set of flags for precise control:
| Option | Description |
|---|---|
-a |
Auto install – Runs non-interactively using the recommended driver. |
-d |
Detect only – Returns true/false if an NVIDIA card is present. |
-l |
Live mode – Pre-asks if you want to install, more interactive (useful for Live sessions). |
-f |
Force install – Proceeds even if no NVIDIA card is explicitly found. |
-q |
Quiet mode – Suppresses non-essential output. |
-c |
Check only – Tells you which driver version your card requires. |
-t |
Test driver – Verifies if the driver is correctly installed and functioning. |
-m <model> |
Model/Version – Specify a particular driver branch. Options:current, tesla-418, tesla-450, tesla-460, legacy-390xx, legacy-340xx, legacy-304xx, legacy-173xx, legacy-96xx, etc. |
-x <features> |
Extra features – Installs additional components like cuda, optix, icd, etc. |
-u |
Uninstall drivers – Completely removes the proprietary NVIDIA drivers. |
-s |
Safe mode – Does not remove conflicting modules (use cautiously). |
-v |
Verbose mode – Provides detailed output for debugging. |
Examples
- Install the driver and include Cuda & extra support:
sudo nvidia-privative-drivers-install -x - Install the recommended driver automatically:
sudo nvidia-privative-drivers-install -a - Install a specific legacy driver with CUDA support:
sudo nvidia-privative-drivers-install -m legacy-390xx -x cuda - Check which driver your card needs without installing:
sudo nvidia-privative-drivers-install -c - Uninstall the proprietary drivers:
sudo nvidia-privative-drivers-install -u
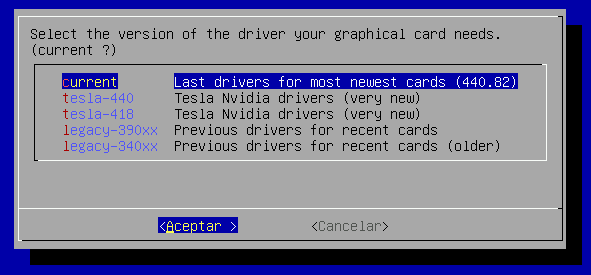
Menu to select your nvidia driver with automatic detection:
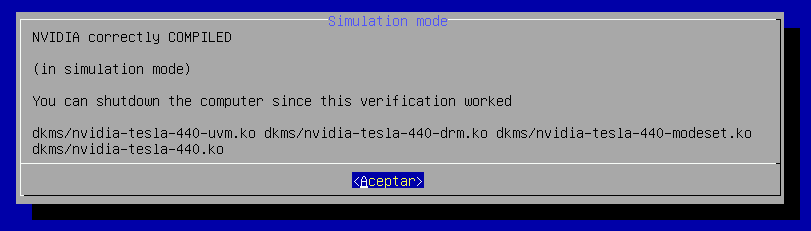
Successfully installed NVIDIA proprietary drivers:
3. Finalize the Installation
Once the tool finishes successfully:
- Update your initramfs (the tool usually does this, but it's safe to run manually):
sudo update-initramfs -u - Reboot your system:
sudo reboot - Upon reboot, the graphical interface should start normally with the proprietary drivers active.
Alternative Methods (Not Recommended)
While we highly encourage using the Elive tool, we acknowledge other methods exist. We advise against them for the following reasons:
-
Debian Official Method – The Debian NVIDIA Wiki describes a manual process using
dkmsand Debian's packaged drivers. It is fragile, requires manual blacklisting, strict version matching, and intricate Xorg configuration. It offers zero automation for different legacy cards and frequently breaks on kernel updates. Only use this if you are a Debian expert. -
NVIDIA Official
.runInstaller – Downloading the.runfile from NVIDIA's website might give you the newest version, but:- It pollutes your system with files outside the package manager, making removal extremely messy.
- It breaks every time the kernel updates (requiring manual reinstallation).
- It does not integrate with Elive's display manager or power management properly.
- Using it prevents the Elive tool from being improved, we rely on your feedback to fix issues for everyone.
If you absolutely must try the .run installer (e.g., for a very specific new GPU not yet supported), boot with the same modprobe.blacklist=nouveau nomodeset 3 parameters mentioned above, log in as root, and execute the .run file. Be prepared to handle kernel updates manually.
Important Final Tips
- Update the tool first to ensure you have the latest fixes and features:
sudo apui elive-tools - If the installation fails, open a console or terminal (if the graphical session loads partially) and examine the logs. The tool outputs clear error messages. Report your findings to the Elive community so the tool can be refined and made flawless for everyone.
- Remember: the Elive tool is your best friend for NVIDIA drivers, use it, test it, and help us make it perfect!